Related Topics:
Clutch Master Cylinder Replacement
Clutch Slave Cylinder Replacement
Bleeding the Clutch Hydraulic System
The Vanagon’s hydraulic clutch system is fairly straightforward and clearly depicted in the Bentley manual, Page 30.2.
 Essentially, the clutch pedal actuates a hydraulic piston-and-cylinder assembly—usually referred to as the “master cylinder”—tucked away just above the base of the steering column. This master cylinder pushes hydraulic fluid through a 10-foot-long pipe running to the engine compartment, where it is connected to a similar piston-and-cylinder assembly known as the “slave cylinder”. This slave cylinder in turn actuates a lever on the side of the clutch bellhousing to engage & disengage the clutch.
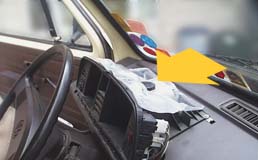
Hydraulic fluid for the entire system is supplied by the same reservoir as supplies the brake system; this reservoir is hidden behind the instrument cluster on the dash, and is accessed by removing the instrument-cluster cover.
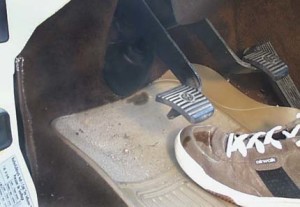 Typically, the first sign of trouble in the clutch system is hydraulic fluid dripping from the master cylinder onto your shoe, carpet, steering column, etc.. Or perhaps a leak surrounding the slave cylinder back in the engine compartment, accompanied by an increasing consumption of fluid.
Failure of either will cause the inability to use the clutch to disengage the transmission, making it difficult or impossible to shift. Insistent pumping of the clutch pedal will result only in the loss of your precious brake/clutch fluid.
Popular Vanagon lore suggests that failure and replacement of either the clutch master or slave cylinder will soon be followed by failure of the other, the theory being that the original cylinders wear out at about the same rate—neither being stronger than the other—so they continue to function together for quite some time. But a new, strong master cylinder will easily overpower the worn seals in a tired old slave cylinder, subsequently blowing it out. On a purely speculative note, I suppose the opposite could be equally true: a new slave could be too much for an old master to handle, causing an imminent failure of the master cylinder.
Some dispute this as mere Teutonic superstition, and I don’t know for certain.
If your Vanagon racks up most of her miles on roadtrips and camping forays, then by definition any mechanical failures will occur far from home. If you prefer to perform this task in the relative comfort of your own driveway rather than a lonely interstate or a distant logging trail in the woods, just replace both cylinders at the same time and be done with it for a good long while.
Parts
- Suitable Clutch Master Cylinder
- Suitable Clutch Slave Cylinder
- DOT-4 Brake Fluid, about a quart
Tools
- Assorted Metric Combination Wrenches
- Assorted Metric Sockets and Ratchet Wrench, with extensions
- Torque Wrench: 0 to 25 ft./lbs
- Phillips Screwdriver
- Vaccuum-pump brake-bleeding kit
- 3-foot-square piece of plastic sheeting and some ever-helpful duct tape: lay this down on your carpeting to catch the inevitable spills
- A small inspection mirror and flashlight may help in seeing what you’re doing in the tight confines above the steering column
- Penetrating oil: squirt some PB Blaster, Marvel Mystery Oil, or similar on exterior nuts, bolts, and bleeder screws a few days before tackling this job, to ease their subsequent removal. Even so, I needed to resort to the judicious application of a …
- Small propane torch, to carefully heat stubborn threaded fasteners.
- Hose clamping tool to prevent fluid loss.
 Here’s a simple homemade alternative to a store-bought hose-clamping tool. Cut a 1″-long section from a 3/8″- or 1/2″-diameter wooden dowel, then split it down the middle to form two half-round pieces. Tape these to the jaws of your locking pliers and use this to carefully pinch off rubber hoses while you work on related components. Not too hard though, or you’ll damage the rubber.
Proceed to “Vanagon Clutch Master Cylinder Replacement”







Way to go. Getting ready to change my slave cylinder and now I know just what to expect. Thanks so much!
Good luck, Bob!
It’s not a particularly difficult job, and makes all the difference.
Keep on vannin’!
Jeff
What if you need to replace the 10 foot long tube and flex hose for the clutch ? Right where it changes to that plastic flex line, my fitting is really, really rusted and the tube is crusty before before that fitting. Seems what while I have the gas tank out, now would be the time to replace it. Think I will just have to take it with me to autozone or napa and hope to find a replacement tube.
Dan,
That clutch pipe is available from the aftermarket:
https://vancafe.com/clutch-hydraulic-pipe-master-to-slave-aftermarket/
You will need to bend it to fit (use your old one as a guide); this article on bending similar brake lines should be helpful:
https://campwestfalia.com/making-custom-rigid-hydraulic-brake-lines/
Hope this helps!