Camp Westfalia

Archive for Kitchen

Using the Westfalia Liquid Propane System

If the galley kitchenette is part of what makes a Westfalia a cozy Camper, then the onboard liquid propane system is the power source of that kitchen.

It provides an exceptionally efficient, affordable, easy, and clean means to run both the refrigerator and the stove.

Let’s have a look at the Westfalia propane system to familiarize ourselves with the various components, and how to use ’em!

Full operating instructions excerpted from the “Supplement to Volkswagen Vanagon Owner’s Manual” for the 1983 Camper can be found here >>

Introduction

The Vanagon Westfalia external LP (Liquid Propane) tank is mounted on the underside of the van, on the left-hand side, and is plainly visible below the Camper hookups. The valves and regulator are protected by a steel shield, and new Campmobiles were delivered with a heavy-duty mudflap behind the left-front wheel to prevent stone damage.

The heavy steel tank is rated for 3 gallons of LP (liquid propane), but is filled to only 80% capacity, to allow room for safe expansion:

  • 2.4 gallons
  • 9.6 lbs.
  • 9.6 liters

Overview

Starting at the rear end of the tank and moving forward, you’ll see the main components:

Overflow Bleeder Valve

The propane technician will open this bleeder while filling your tank to release excess propane vapors, and as an indication as to when the tank has reached its capacity of 80%.

Fill Valve

Under a protective plastic cap is the heavy brass fill port fitting. This is where the technician will connect his filler hose valve to pump pressurized propane into your tank.

Main Control Valve

This primary valve is what turns On or Off the supply of propane from your tank. As with most such valves, turn it clockwise to turn the propane supply Off; turn it completely counter-clockwise to turn the propane On.

Two-Stage Regulator

Opening the Main Control Valve allows high-pressure propane to enter the first stage of the regulator, which reduces the pressure to about 15 PSI. A secondary stage further reduces the line pressure to about 0.5 PSI for use by the kitchen appliances. The regulator is often covered by a protective plastic housing to keep it clean of mud, etc..

Tee Fitting

Immediately to the left of the regulator the line divides into two supply lines, which pass upward through the floor of the van to provide propane to the kitchen; the upper copper line supplies the refrigerator, while the lower line provides gas to the stove.

Filling

The Westfalia LP tank accepts a standard fill nozzle found at most commercial propane dealers, such as RV service centers, U-Haul outlets, many hardware stores, and some campgrounds. Unfortunately, many younger or inexperienced LP technicians may be unfamiliar with the Westy’s older design. So, if you find a place that you like, continue going there for your propane refills.

Compared to most other RVs, the Westfalia’s LP fill port is mounted quite low to the ground, and is relatively difficult to access. You can make things easier for your propane guy by parking near the LP station, laying out a padded foam kneeling pad or carpet scrap, and removing the plastic cap from your fill valve. Make sure the main control valve is OFF before filling. I also like to ensure that the overflow bleeder valve is working freely by briefly loosening & tightening it beforehand, so the tech doesn’t need to twist on it with a pair of old pliers. Wear a heavy glove when doing this, to avoid severe cold-burns from escaping liquid propane.

At only 3 gallons, the Westy’s tank is barely half the capacity of a typical BBQ propane tank, and is likely one of the smallest tanks many techs will encounter. So, it tends to reach capacity sooner than expected unless completely empty, and results in only an eight-dollar sale.

Let the tech do his thing, and consider tipping him for his troubles. Replace the filler valve cap, and make sure the overflow bleeder valve is fully closed (an LP tech once left mine somewhat loose, resulting in a slow but dangerous LP leak).

Driving

Though legal to drive while using the propane to power the fridge, save the LP and switch the fridge to 12 VDC while underway.

Liquid Propane Consumption
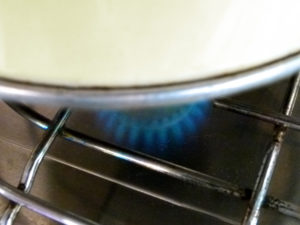
Though the tank is small, both the stove and the fridge are quite efficient, so a refill lasts a good long while. In normal usage, even running the fridge 24/7 and cooking 1-2 hot meals each day, a single tankful will last an entire month.

The Westfalia propane tank has no gauge to tell you how much LP is left, so after a refill, start a simple log book to keep track of your typical camping days, so you have some idea of how much fuel you can expect from a tankful.

Maintenance

The LP system requires virtually no periodic maintenance, other than routine washing of the tank exterior, valves, and regulator. Periodically inspect these parts, the tank body, and the supply lines for dents, scrapes, or other damage. If you ever smell the distinctive odor of liquid propane, immediately make sure the main control valve is closed. You can also spray soapy water on any of these components; if the soap mixture forms bubbles, there is a leak.

If ever in doubt, see a qualified RV propane service center for repair or replacement of your tank or other components.

Finally …

As the main fuel source for the stove and refrigerator, the liquid propane system is a key player in the Westfalia Campmobile, and provides easy, economical, and reliable convenience.

Have any questions or comments about the Westfalia liquid propane system? Post ’em below, and use the social links to share with friends!

Instructions for the Westfalia Liquid Propane System

NOTE: the following text and photos are excerpted from the 1983 Camper “Supplement to Volkswagen Vanagon Owner’s Manual.” For more info on using the LP system see, “Using the Westfalia Liquid Propane System.”

Downloads
1980-1985 Vanagon Westfalia Campers: “Supplement to Volkswagen Vanagon Owner’s Manual”
1986-1990 Vanagon Westfalia Campers: “Supplement to Volkswagen Vanagon Owner’s Manual”


Propane Gas Tank

The liquid propane gas tank is located under the left side of the vehicle. The equipment includes two pipe lines; one for cooking and one for refrigeration. Instructions for refilling the tank are listed on the sticker and in a separate pamphlet. The propane gas tank capacity is 3 gallons/12 liters.

Setting Up Your Camper Van Kitchen

How to outfit and organize your campervan kitchen to make the most of your precious cooking and clean-up time!

The Westfalia Camper boasts a small galley kitchenette which includes a refrigerator powered by AC/DC electricity or by liquid propane, a two-burner LP stove for cooking, and a sink for food prep and cleanup. Storage for food and kitchen wares is provided by several cabinets.

Like most campervans and other small motorhomes, space is at a premium, so smart use of limited resources will help you stay organized and make cooking easy and fun. Here are some ideas for outfitting your own camper van kitchen.

Feel free to grab the graphic or share the article with friends or on your own blog or website!

Storage

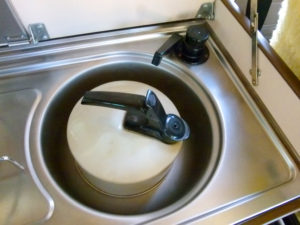
Dry packaged and canned goods are perhaps best kept in the two rearmost top-entry cabinets. A compact tea kettle with folding handle may fit inside the sink, along with Camp-Suds and scrubby for dishwashing.

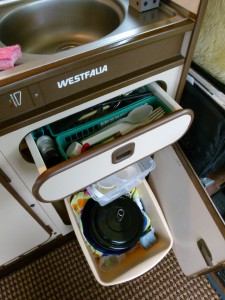
Cutlery, knives, can opener, and most other cooking utensils will fit in the small drawer below the sink.

The large cabinet below provides pretty ample storage for pots, pans, griddles, and food storage containers. A dishpan serves as a handy ‘drawer’ to organize most cooking wares, and can also be used for its original purpose.

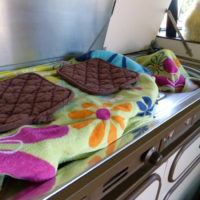
To prevent jostling and annoying rattles while driving, place thin rubber shelf liners inside cabinets, and dish towels and pot holders or trivets can be laid over the stove burners.

Just as at home, you’ll want to store leftovers or other unused foods for later use. Lightweight plastic food containers with snap-on lids save space, both when nested for storage, and when stacked for keeping food. Work well for dry goods and refrigerated items. Smaller quantities can be kept in zipper-lock plastic baggies. A few chip clips for resealing plastic food and snack bags.

Work Surfaces

Space for food prep is in short supply in the Westfalia, so be smart and creative.

The original Westy table can be mounted either directly behind the driver’s seat, or above the rear kitchen cabinets, and can be pivoted in a range of positions for best use.

If not immediately using the stove burners, flip down the stainless steel drain board, or close the lid completely to use the countertop surface.
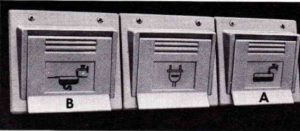
When the popup roof is raised, there is a large ‘shelf’ offered by the folded upper bunk; this is a great place for ingredients, cookware, and utensils you’ll be using immediately.

A large cutting board makes for an additional, portable work surface for chopping vegetables, assembling sandwiches, and other food prep. Get one with raised edges to help contain messes.

Cooking

Modern cooksets made for camping and backpacking offer several advantages over pots and pans from your home kitchen. Most can be nested inside one another, or feature folding handles, to save space and reduce clutter. They’re often made of aluminum or other lightweight materials. Many feature bottoms optimized for better heat dispersion when cooking on a camp stove or small burner, to avoid scorching.

Most such cooksets include a small- and a medium-sized pot, a small frypan, and a lid and handle/gripper to fit them all. When cooking for two, a 1 1/2-quart and a 2-quart pot should be sufficient; larger sets are available for larger crews.

Though small, the included frying pan does have its uses for light-duty heating, but you’ll probably want a larger pan for most frying, sautéing, and flapjacking. If your pan doesn’t include a lid, pick one up in a thrift store.
Oven mitts or pot holders protect your hands and countertops when handling hot pans.
A small set of kitchen knives of various sizes with snap-on sheathes will provide all your chopping, dicing, and mincing needs.

Two or three mixing bowls of various sizes; double as serving bowls for chips and other snacks.

Other typical cooking utensils: spatula, spoons, ladles. Smaller, lightweight camping versions save space and weight. Can opener, bottle opener, and corkscrew. Small multi-spice shakers. A grater for cheeses, vegetables, and other foods. A collapsible strainer for draining pasta.

Serving

Cooking in your campervan can be fun, but eating is even better! Again, lightweight and compact is the key here, and dining wares made for camping & backpacking are the ticket.

Stacking, plastic plates and bowls are durable and quiet, and help keep your food warmer longer, especially when dining outdoors.

Matching polycarbonate cutlery offer the same advantages: knives, forks, spoons, even the thrifty and versatile spork.

The same thermal beverage mugs or cups used when driving can be utilized at the dinner table, or use dedicated plastic cups and glasses for meal time.

Use placemats or a heavy vinyl tablecloth on untidy outdoor campsite picnic tables, especially if the previous occupant gutted a couple of brook trout on the table, or was an incontinent seagull …

Clean-up

Seldom the favorite part of mealtime, there’s no need for tidying up to be laborious. Like cooking, let’s keep it quick and easy.

Stow any leftovers away in the storage containers mentioned above. Scrape any heavy remainders from cookware using a thin plastic pot scraper.

A five-gallon plastic bucket with a padded seat, often used by hunters and fisherfolk, also serves as a convenient container for trash and recyclables when lined with a couple of trash bags.

Water can be heated in a teakettle while you eat, then used for dishwashing and cleanup. Simply pour it into the Westfalia kitchen sink or a separate dishpan, and add cold water to temper.

Conserve your biodegradable Camp-Suds by applying a few drops directly to your non-scratch scouring pad. Start by washing your least-dirty cups, cutlery, and plates first, followed by the messier, greasier pots and pans. Rinse cookware directly in the kitchen sink, and set out on the drain board to dry.

Synthetic microfiber dish towels are extra-absorbent and quick-drying.

Dirty dishwater should be collected in a gray-water container, and not drained directly on the ground. Empty the container in a campground toilet or a designated dishwater-collection receptacle.

BONUS

Any ways in which you can get double duty out of your kitchen gear will save you space, expense, and time!

  • A large cutting board with raised sides can also be used as a serving platter for sandwiches, wraps, and other foods.
  • A flat grater for shredding vegetables and cheese takes up almost no space, and doubles as a pasta strainer!
  • Experienced backpackers often eat from the same pot in which they cooked, using the same spoon with which they stirred, to minimize clean-up time.
  • Slip dish cloths between pots and plates to protect non-stick coatings, and store towels and pot holders on the stove burners to help reduce annoying rattles while underway.
  • Mixing bowls can also be used as serving bowls for snacks, or use food storage containers for both!

Finally …

With some basic camp-cooking and serving wares, and some smart packing, you can make the most of your Westfalia Camper kitchen.

Find more ideas for packing and organizing your entire van here!

Got any Westy kitchen cooking & clean-up advice or tips? Leave a suggestion or question below, and use the social links to share with friends!

Using the Westfalia Kitchen Sink

The galley sink, like many other Westfalia components, is a handy and compact feature that makes cooking and kitchen cleanup easier, with no need to haul big jugs of fresh water around, or to wash your dishes out in the rain and bugs.

With a Vanagon Westfalia Camper, you have everything AND the kitchen sink!

Full operating instructions excerpted from the “Supplement to Volkswagen Vanagon Owner’s Manual” for the 1983 Camper can be found here >>

Introduction

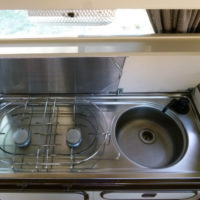
Tucked away beneath the main galley cabinet lid is the stainless steel sink, right next to the two-burner stove. The sink’s water is supplied by one of two sources:

Onboard water tank
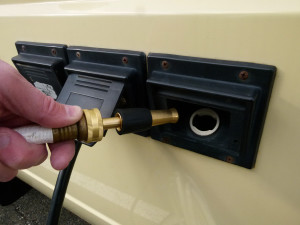
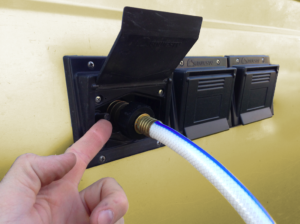
Concealed beneath the rearmost galley cabinet is a 13.2-US-gallon (50-liter) plastic water storage tank. It is easily filled from a home or campground water hose via the external filler port, the rearmost of the three hookups located on the driver’s side (before filling the tank, be sure the drain cap on the underside of the van is secured). You’ll need a key to unlock the filler port, to prevent tampering. Inside the tank is a small submersible water pump, which sends water to the sink via a hidden hose routed behind the cabinets and fridge.
After a trip, this supply tank should be drained and cleaned and dried, for proper hygiene; see below.

High-pressure ‘City’ water connection
This is the forward-most of the external camper hookups, and accepts a standard garden hose. Connect the other end to a campsite water supply. The standard city water supply pressure of 40-50 PSI may be too much for the old plastic connectors and supply hose inside the van, so you may consider an aftermarket pressure regulator made for this purpose.

At 10.5 inches (265 mm) in diameter, and just 1.7 gallons (6.4 liters) capacity, the sink is … of humble proportions. But it’s large enough to fit a few plates and a couple of bowls, and is perhaps best used for washing dirty dishes individually.

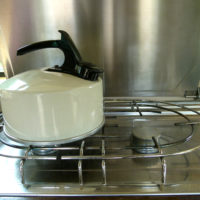
It’s also just the right dimensions to store a vintage tea kettle (color matched to our Ivory Vanagon, and featuring the same number of dents), which I picked up in a thrift store several years ago while travelling. Such a kettle, or a modern equivalent, is great for heating water for instant oatmeal, coffee, or dishwashing. Or, of course, for tea.

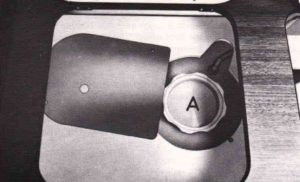
Just to the left of the sink, mounted to the underside of the kitchen cabinet lid, is a protective heat shield. On Canadian models, this deflector is permanently affixed; on US models, this heat shield can be unsnapped and hinged downward to lay flat, to serve as a drain board when washing & drying dishes (note the angled surface and small drain slot over the sink).

NOTE: Many new Westfalia owners mistakenly assume this heat shield/drain board is a griddle or hot plate. It is not, and this will quickly discolor and buckle the heat shield, and food will stick and burn. DO NOT USE IT AS COOKING SURFACE.

Checking the Water Level

Turn on the main switch (G) on the kitchen control panel. The left column of lights indicates the remaining volume of fresh water in the storage tank as follows:
(C) Green: 13.2-10.5 US gallons (50-40 liters)
(D) Yellow: 10.5-4.0 US gallons (40-15 liters)
(E) Red: 4.0-0.8 US gallons (15-3 liters)

Turning on the Taps

Before using your kitchen sink, be sure to remove the drain cap located on the underside of the van, just behind the left-front wheel. Replace after using.

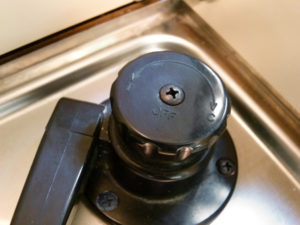
The knob on top of the sink faucet controls the water flow: turn the knob counter-clockwise in the direction of the “T” mark to activate the tank pump and draw water from the onboard storage tank, turn clockwise toward the “C” mark to draw city water when connected to an external supply.

If your sink has not been used in some time, it may take a few tries for the pump to prime the supply lines and for water to flow from the tap.

You can also install an aftermarket hands-free foot switch to turn the tank pump on/off, which makes rinsing dishes and cookware easier.

Draining

Just like your kitchen sink at home, the Westy sink has a drain stopper/strainer so you can fill the sink right up. When done washing, simply rotate the stopper to allow the water to drain out, straining large food particles and debris which might otherwise plug your P-trap or drain line.

Whether camped in an established campground or in the backcountry, it’s important that “gray” water—used dish and hand washing water—not be dumped on the ground. Connect a hose to the drain outlet on the underside of the van and run this to a campsite wastewater collection hookup, or use your own portable gray water collector.

Water System Care & Maintenance

After each trip, as part of your basic routine, pour a half-gallon of hot fresh water down the sink drain to flush any debris from the P-trap, then rinse and dry your gray water bag.

Remove the cap from the bottom of the water storage tank to drain the unused water, and maybe drive around like this for a bit to allow any remaining water to slosh out.

If you notice stale tastes or odors from your Westfalia water system, try adding an ounce of RV water freshener to each tankful. This can help reduce the taste of plastic, metal or sulfur, and eliminate algae and slime buildup in your water tank.

For more seasonal care to keep your water system clean and healthy, see “Winterize Your Westfalia for Storage.”

Finally …

Along with the stove and refrigerator, the water supply and sink system is just another of the ingenious features that makes a Westfalia Camper a home. We use ours regularly, and besides the periodic cleaning and maintenance mentioned here, have only recently had to replace the original 35-year-old main water pump.

It’s a convenient feature for meal prep and cleanup, and provides cool drinking water and hot coffee in the morning. Heck, I once even replenished a leaking engine coolant system with water from the kitchen sink!

Have any questions or comments about the Westfalia kitchen sink and water supply? Post ’em below, and use the social links to share with friends!

Dometic RM182 Refrigerator Instructions

NOTE: the following text and photos are excerpted from the 1983 Camper “Supplement to Volkswagen Vanagon Owner’s Manual.” For more info on operating the fridge see, “Using the Westfalia Refrigerator.”

Downloads
1980-1985 Vanagon Westfalia Campers: “Supplement to Volkswagen Vanagon Owner’s Manual”
1986-1990 Vanagon Westfalia Campers: “Supplement to Volkswagen Vanagon Owner’s Manual”


Refrigeration

The controls for gas/electric refrigeration are arranged along the top edge of the refrigerator. They are accessible by opening the refrigerator door.

A: Pump Knob
B: Safety Valve Button
C: Thermostat Control Knob
D: Voltage Selector Switch
E: Gas Valve Knob
F: Flame Indicator Light

Startup Procedure for Propane Operation:

  1. Turn the gas valve on propane tank to ON.
  2. Move the Voltage Selector Switch (D) to GAS (center position).
  3. Turn Gas Valve Knob (E) to ON.
  4. Turn Thermostat Control Knob (C) clockwise to MAX.
  5. Pull Pump Knob (A) and pump in and out at least 15 to 20 times.
  6. Press and hold Safety Valve Button (B), at the same time push Pump Knob (A) in completely until an audible click is heard.
  7. Continue to hold Safety Valve Button (B) until the Flame Indicator Light (F) in the sink cabinet control panel comes on and remains on. This should require about 15-30 seconds.
  8. If the Flame Indicator Light (F) does not come on, or if it flickers on but goes out again, the pilot light has failed to ignite to a steady burn. This might happen if the refrigerator has not been used for some time, or if the outside temperature is low. Repeat steps 5-7.
  9. After a few minutes, check the Flame Indicator Light (F) again, to assure yourself that the pilot light is still burning. The pilot light flame can also be observed through the sight glass in the lower left hand corner of the rear wall inside the refrigerator.
  10. Should the pilot light snuff out unexpectedly, the Flame Indicator Light (F) will also go out, and the thermocouple safety valve will automatically shut off the gas flow.
  11. Temperature inside the refrigerator can be regulated with Thermostat Control Knob (C). The center position will usually maintain sufficient cooling. In hot weather, or when more cooling is required, turn the knob toward MAX.

To discontinue gas operation:

  1. Turn Pump Knob (A) to OFF.
  2. Turn Gas Valve Knob (E) to OFF.
  3. Turn Thermostat Control Knob (C) to GAS MIN.

To assure yourself troublefree gas refrigeration at altitudes above 6500 feet or 2000 meters, it is necessary to install a smaller gas burner jet. Therefore, if you use your camper predominantly at high altitudes, the no. 24 jet installed in the burner tube should be replaced by a no. 22 jet. Contact the Dometic Refrigerator Service center in your area for this service.

NOTE: When the liquid propane tank is refilled, air will remain in the gas line. Before using gas refrigeration, we recommend bleeding the system by lighting the burners of the gas stove. Let burners burn for about one minute. This will help air escape more rapidly.

Procedure for Electric Operation:

  1. Move Voltage Selector Switch (D) to AC 120 V.
  2. Make sure Gas Valve Knob (E) is in OFF position.
  3. Turn Thermostat Control Knob (C) clockwise to MAX. When the refrigerator interior is sufficiently cold, turn Knob (C) from MAX to an intermediate setting.

The 12 Volt power supply from the vehicle battery can be used only when the engine is running and the Voltage Selector Switch (D) is set on DC 12 V.
The 12 V circuit is not thermostatically controlled.

To Discontinue Electric Operation:

  1. Move Voltage Selector Switch (D) to GAS (center position).
  2. Turn Thermostat Control Knob (C) to GAS MIN.

Defrosting the Refrigerator

Keep an eye on the ice formation on the evaporator core. Too much ice build-up reduces cooling efficiency. We recommend frequent defrosting. Never let the ice thicken more than 1/8” (3-4 mm).

Make sure that Gas Valve Knob (E) is in OFF position, and that Thermostat Control Knob (C) is in the GAS MIN position.

Empty the refrigerator, leave the door open and let the ice melt into the catch basin below. Pull the basin out to empty the water and dry off before reinstalling.

Cleaning the Refrigerator

Clean the refrigerator interior with a solution of lukewarm water and baking soda.

To keep the door seal air tight, clean the seal around the door with clear water only. Chemical additives, oil and grease much to come into contact with the seal.

Ventilation

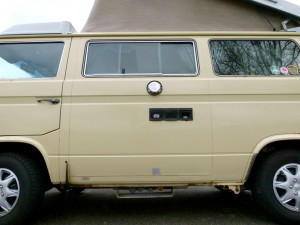
Keep all vent openings clean and unobstructed to assure efficient cooling. Vent openings are located below the refrigerator door, behind the heart shield of the gas range, in the left sidewall of the sink cabinet, and in the left outside panel of the vehicle.

Inspect the propane tank and lines periodically for tightness and leaks. Use soapy water to test for leaks — NOT MATCHES.

Start refrigerator several hours before storing food. Precool or freeze food items at home before loading your Camper refrigerator.

Leave spaces between food and drink items for the necessary air circulation. Use unbreakable plastic containers and bottles, and seal them tightly to prevent spilling.

Condensation

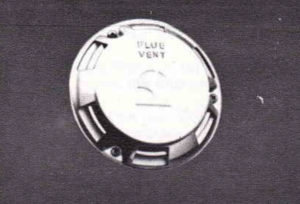
The FLUE VENT must be kept uncovered at all times.

Only when you wash the Camper, or while taking the vehicle through an automatic car wash, should the Flue Vent be covered.
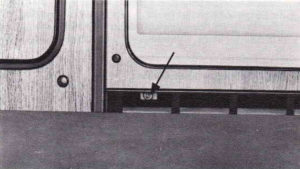
To drain accumulated water due to normal condensation, open the screw on the condensation drain pipe (arrow).

When the refrigerator is operating, be sure to park on level ground to maintain efficient cooling. If the vehicle remains stationary for any length time on gradients exceeding +/-8˚, the cooling output will be considerably reduced. Should level ground parking be unavailable, it is best to discontinue operation to prevent overheating of the core which can lead to permanent damage of the refrigerator.

Using the Vanagon Westfalia Refrigerator

The Vanagon Westfalia Camper refrigerator is convenient and efficient; here’s how to use it.

No camper-van kitchen is complete without the ability to keep your food cold to preserve it and prevent spoilage. And the value of a cold beer or soft drink at the end of a long hot day of road tripping requires no explanation …

Full operating instructions excerpted from the “Supplement to Volkswagen Vanagon Owner’s Manual” for the 1983 Camper can be found here >>

Introduction

The Vanagon Westy Dometic RM182 refrigerator is located in the lower kitchen cabinet, immediately below the stove. At 1.5 cubic feet (45 liters) of interior volume, it’s a little smaller than a dorm-room mini-fridge, so smart packing is required.

Generally speaking, when the original Dometic is in good working order, it is capable of keeping food about 40-50 degrees Fahrenheit (or 20-25 degrees Celsius) below ambient air temperature. It will struggle to keep food at safe temperatures when temps inside the van exceed 90-100˚F (32-38˚C).

The refrigerator interior features two moveable shelves, and two additional compartments on the inside of the door for small food items, bottles, or cans.

In the upper-rear of the fridge interior is the evaporator core, or cooling element. When ice occasionally forms on this evaporator, turn the fridge off to defrost and allow the ice to melt.

Power

The Westy refrigerator is operated by one of three power sources:

120-volt AC electrical power (household or shore power)

To use this, connect an extension cord from a nearby power outlet to the van’s external power inlet on the side panel near the other utility hookups. The fridge is very effective when powered this way, keeping food quite cold.

12-volt DC (alternator or auxiliary battery)

In stock form, Westfalia Campers were equipped with a relay to allow the fridge to be powered by the alternator whenever the engine is running. It automatically cuts all power to the fridge when the engine is stopped, to prevent draining the starting battery.

Some owners add a second, auxiliary battery to their van and wire it through a relay or other circuits in order to power the fridge via 12V for longer periods.

Liquid Propane (LP)

The fridge can also be fueled by the same external LP tank as the Westfalia stove. Just after the main shutoff valve and two-stage LP regulator attached to the tank, the supply splits into two copper lines: one feeds the stove, and the other the fridge.

The fridge is also very efficient when powered this way, with a full LP tank supplying the fridge 24/7 for at least a full month before requiring a refill.

See below for more info on starting and operating the fridge on LP.

Effectiveness

As for temperatures, the Dometic fridge will attain its coldest temps when powered by (in order):

  1. 120-volt AC
  2. Liquid Propane
  3. 12-volt DC

Controls & Operation

The Dometic controls are located inside the fridge door, just above the main compartment.

Full operating instructions excerpted from the “Supplement to Volkswagen Vanagon Owner’s Manual” for the 1983 Camper can be found here >>

The Fridge Routine

As outlined in “The Routine,” here’s a brief synopsis of running your fridge during a typical trip:

Pre-Trip Preparation, often the day prior to departure

  • Ensure that LP (liquid propane) tank is sufficiently full, and that main shutoff valve on tank is closed
  • Pre-chill refrigerator overnight on 120V AC shore power; add cold beverages to provide thermal mass

Hitting the Road, the day of departure

  • Load any remaining cold food into pre-chilled refrigerator
  • Disconnect refrigerator from 120V AC shore power, switch to 12V DC, or open main LP valve and light for driving

Arrive in camp:

  • Park van using parking brake and, if necessary, RV levelers
  • Open main shutoff valve on LP tank to operate refrigerator on liquid propane, switch refrigerator control to LP, and light
  • If 120V AC power is available, you can optionally power the fridge with this; use extension cord to connect campsite shore power station to camper hookup; switch refrigerator to 120V AC

Breaking camp

  • Disconnect 120V AC shore power and water hookups
  • Close main shutoff valve on LP tank, switch refrigerator to 12V DC or LP for driving

Post-Trip Cleanup

  • Turn refrigerator off; remove remaining food and wipe clean

Tips & Tricks

In addition, here are some insights gained from many years of operating these compact, convenient, efficient, but sometimes fretful fridges.

Pre-Chill on 120VAC Shore Power

The Dometic fridge does well at maintaining cool temps, but benefits from a head start. A few hours before using your fridge, plug it into shore power to pre-chill it. The thermal mass of a cold six-pack inside will further aid pre-chilling, and help make the fridge easier to light on LP later.

Pack it Cold

When loading foodstuffs in the fridge, try to use pre-chilled food whenever possible, so the fridge needn’t struggle to get/stay cold.

Check It Out

As mentioned in the Owner’s Manual instructions, the Flame Indicator Light will tell you the fridge’s LP chamber is still burning. But you can also easily confirm the fridge’s continued operation from outside the van by feeling the exterior vent with your hand: a bit of warmth here indicates the fridge’s LP chamber is still burning.

Just Chillin’

A small clip-on RV fridge thermometer lets you monitor your fridge’s interior temps; a simple analog model requires you open the fridge door to have a peek (losing some of your precious cold air), while a wireless version works remotely.

Stay on the Level

When parked, the Dometic fridge must always be kept somewhat level; the Owner’s Manual specifies no more than +/- 8 degrees on incline, to prevent overheating and permanent damage to the heating element. A set of RV levelers and level indicators will help you find a suitable parking spot.

Made in the Shade

To help the fridge keep your cucumbers cool, choose a parking spot or camp site out of direct sunlight, and if possible open a couple of windows an inch or so to keep the van interior cooler.

Periodic Maintenance

Though usually very trouble-free, the Westfalia’s Dometic fridge may sometimes be difficult to light, or fail to keep your food cold. Here are some ideas to try before removing the fridge for DIY service.

Photo: Shooftie

Suck It Up

The fridge’s exterior vent houses two conduits: air intake and exhaust vent. These can become plugged with debris which can make its way down to the burner chamber: leaves and seeds, dead bugs, spider webs, etc.. Remove the outer vent cover to expose the two conduits, and alternately apply the end of a shop vac to each one to clean out any accumulated junk.

Clear the Air

Igniting the LP burner requires a bit of fresh air in the burn chamber, usually provided by the tiny pump built into the ignitor knob. But over time this pump can begin to fail, making ignition difficult. If you’re having problems, remove the cap from the small condensation drain pipe below the fridge and attach a bicycle pump. Give it several strokes of fresh air, and try igniting the fridge again.

Hope this helps you enjoy your own Westfalia Dometic fridge. And if you have any fridge questions or suggestions, post ’em up below!

Using the Westfalia Stove

The Vanagon Westfalia stove makes camp cooking easy and efficient.

The stove in our Westfalia Camper has enabled us to start countless days of roadtripping with a belly-filling breakfast, whip up a quick lunch or a hearty dinner, or to enjoy a cup of hot cocoa while watching snow flurries descend from the icy peaks surrounding Crater Lake.

The Westfalia galley kitchenette is one of the distinguishing features which truly makes a Vanagon a Campmobile!

Full operating instructions excerpted from the “Supplement to Volkswagen Vanagon Owner’s Manual” for the 1983 Camper can be found here >>

Introduction

The Westy stove is fueled by the same external LP (Liquid Propane) tank as the Dometic refrigerator. Just after the main shutoff valve and two-stage LP regulator attached to the tank, the supply splits into two copper lines: one feeds the fridge, and the other the stove.

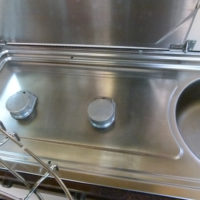
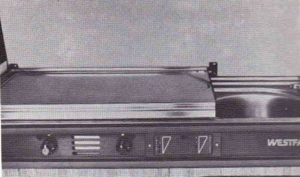
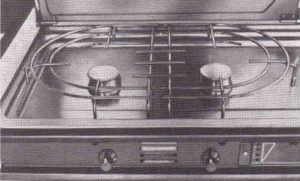
Inside, prop the kitchen cabinet lid open to reveal the stove, right next to the sink. A large oval grate covers the two gas burners, and beneath that the large stainless steel base catches the inevitable spills.

Above, mounted to the kitchen cabinet lid, is a stainless steel heat shield to protect the underside of the cabinet lid. On Canadian models, this deflector is permanently affixed; on US models, this heat shield can be unsnapped and hinged downward to lay flat, to serve as a drain board when washing & drying dishes (note the angled surface and small drain slot over the sink).


NOTE: Many new Westfalia owners mistakenly assume this heat shield/drain board is a griddle or hot plate, and commence to fryin’ bacon or flippin’ flapjacks on it. This will quickly discolor and buckle the heat shield, and food will stick and burn. DO NOT USE IT AS A COOKING SURFACE.

If your Vanagon’s previous owner neglected to remove the blue plastic protective film from your heat shield, do it now.

Lighting

The burner controls for the stove are located on the front kitchen panel. Look for the three flame symbols on the edge of the control knobs, indicating OFF, HIGH, and SIMMER.

To light the stove, first make sure the main valve is opened on the external LP tank. Depress and turn the stove burner knob to HIGH, and listen for the quiet hiss of gas from the burner. Use a butane lighter or a stove ignitor to ignite the flame, and adjust for cooking. Just as with your home barbecue grill, if it’s been awhile since your stove was used, or you ran completely out of LP before refilling the tank, you may need to run both burners for awhile to prime the supply line before it will light.

Once lit, simply adjust the flame for whatever type of cooking you’re doing. A larger pan or pot on the stove can block your view of the flame, but the flame can be seen reflected in the stainless steel base beneath the burners.

Cooking

On some Westfalia stoves, the SIMMER setting may allow the flame to go out, so set the control knob just a little higher.


Note that the burner grate stands on ten short ‘legs’; two of these legs engage in a couple of holes in the lower stove base. To remove the grate for cleaning, grasp the leg nearest you when standing in front of the stove, and firmly pull toward you to disengage the leg from the base, and lift the entire grate free.

Propane generally provides very even heating, but hot spots and scorching can be further prevented by using pots and frypans with fine heat-dispersing grooves engraved on the bottoms. We typically use lightweight nesting backpacking pots and frying pans with folding or detachable handles to save space. Be careful when using very small pots on the stove though, as these may tip or topple through the rather large central gaps in the grate. You can add versatility to your stove by adding a double-wide griddle for large-volume frying.

We also use a vintage teakettle for heating water for tea, instant soups, dishwashing, etc.. When not being used, it rests inside the sink, wrapped in a dish towel to prevent rattles.

Always allow the stove to cool after using and before stowing away for travel. To prevent annoying metallic rattles of the grate and the heat shield while underway, lay a couple of hot pads or dish towels over the grate before closing the lid.

Finally …

The stock stove is a crucial feature that adds great utility to the Westfalia Camper. We use ours on a daily basis when traveling, for everything from simple hot water to full-on multi-course meals. With adequate ventilation and tidy cooking habits, you can avoid lingering food odors unless you enjoy a lot of bacon or fried fish.

A comparable Coleman two-burner camping stove requires frequent refills of a highly flammable fuel which must be handled and carried somewhere on board. By contrast, the Westy stove-and-fridge combo will run on LP cleanly, safely, and economically for at least 30 days and nights before requiring a $7 refill.

I will never forget the taste of a pair of fresh pan-fried brook trout, resting on warm beds of wild rice, accompanied by cold bottles of beer, enjoyed with a longtime friend on the grassy banks of the very stream in which he’d caught them only minutes before.

Few things bring together family and friends like good food, and the Westfalia stove often makes it possible …

Have any questions or comments about the Westfalia stove? Post ’em below, and use the social links to share with friends!

Vanagon Westfalia Water System Instructions

NOTE: the following text and photos are excerpted from the 1983 Camper “Supplement to Volkswagen Vanagon Owner’s Manual.” For more info on operating the water system and sink see, “Using the Westfalia Kitchen Sink.”

Downloads
1980-1985 Vanagon Westfalia Campers: “Supplement to Volkswagen Vanagon Owner’s Manual”
1986-1990 Vanagon Westfalia Campers: “Supplement to Volkswagen Vanagon Owner’s Manual”


Sink Cabinet Cover

Before opening the lid cover, slide the driver’s seat forward to make room.

The left underside of the lid cover has a stainless steel heat shield/drain board. The heat shield can be unsnapped to cover the gas burners. While leaving the sink open for dish washing, the heat shield provides convenient drain board space.

In the Canadian version the heat shield cannot be unsnapped and used as a drainage board.

CAUTION

Do not put the heat shield over and open flame or a hot burner. Never attempt to use the heat shield as a hot plate or grille.

Water Supply

City Water connection

To provide you with the convenience of an ample water supply at campsite, a hose fitting B has been installed in the left side panel of the vehicle.

When city water is not available, you can carry your own supply in the built-in water tank, located in the storage chest between sink cabinet and clothes closet. The water tank can be filled from outside through the lockable filler cap A installed in the left side panel of the vehicle.

Tank capacity is 13.2 US gal. or 50 liters.

Remember that any weight carried affects fuel economy. Consider filling your water tank shortly before you reach the campsite and not at home.

Water pump switch

The electric water pump is immersed inside the water tank. After filling the water tank, and the green indicator light in the control panel comes on, activate the water pump by turning th switch knob on top of the faucet to the left; in direction T (Tank). Turn the knob several times in 10-second intervals to bleed the hose until water runs into the sink.

NOTE: When the city water hose connection has been made, turn the water pump switch knob on top of the faucet in direction C (City).

The water pump and all lights in the control panel can be turned on or off with switch G. The left column indicates how much water is left in the tank. The right light column indicates the condition of the battery explained on page 12.

(C) Green: 13.2-10.5 US gallons (50-40 liters)
(D) Yellow: 10.5-4.0 US gallons (40-15 liters)
(E) Red: 4.0-0.8 US gallons (15-3 liters)

Water Tank Filling

To unlock the filler hose stopper, turn the key clockwise on quarter of a turn and pull stopper out.
To lock the filler hose opening, insert stopper, turn key counter-clockwise one quarter of a turn and remove key.

The water tank vent pipe opening is located above the filler hose stopper.

The protective cover should not be removed, nor must the vent pipe opening be closed off.

Water Drainage

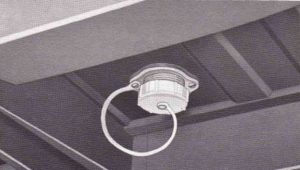
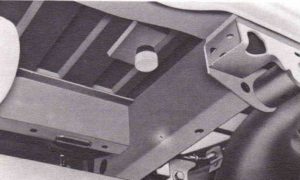
The sink pipe drain extends through the underbody of the vehicle to an opening aft of the left front wheel. The drain pipe opening has a screw-on plastic cap. Remember to remove the cap before using the sink, and always replace the cap securely when the sink is not in use.

Water from the sink drains onto the ground. Therefore, be mindful where you drain the sink water.

The drain plug for the water tank is located under the vehicle in front of the left rear wheel. Always replace the screw-on cap securely after cleaning the water tank.

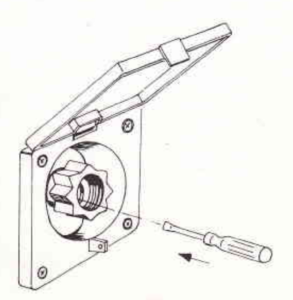
When danger of frost exists, make sure water is not left in the city water connection. Press screwdriver into the valve opening until water is drained.

Water tank

We recommend you drain the water tank after every trip.

Tilt up storage chest lid.

Unscrew the cover shield and remove the plastic stopper A.

Unscrew the drain plug to empty the tank. Close the drain plug but leave the stopper open to allow the tank to air out. Should there be an odor, flush the tank with a solution of baking soda and water. Rinse the tank thoroughly with clear water and allow it to dry.

Vanagon Westfalia Stove Instructions

NOTE: the following text and photos are excerpted from the 1983 Camper “Supplement to Volkswagen Vanagon Owner’s Manual.” For more info on operating the stove see, “Using the Westfalia Stove.”

Downloads
1980-1985 Vanagon Westfalia Campers: “Supplement to Volkswagen Vanagon Owner’s Manual”
1986-1990 Vanagon Westfalia Campers: “Supplement to Volkswagen Vanagon Owner’s Manual”


Gas Stove

PRACTICE SAFETY AT ALL TIMES!

  • DO NOT USE THE GAS RANGE WHILE DRIVING!
  • Keep combustible materials clear of the lighted burners.
  • The burner orifices have been set by the factory for safe operation. DO NOT CHANGE THEIR SIZE!
  • Keep a lighted match ready when turning on the burners.
  • Keep windows or door open when cooking. Gas flames consume oxygen.
  • Never light the burners to heat the interior of your Camper.
  • Make sure the propane tank is securely fastened in place.
  • Check tank and lines from time to time to be sure they are tight. When testing for leaks, use soapy water. DO NOT USE MATCHES!
  • Do not put the sink cabinet cover over an open flame. Wait til the burners and the cooking rack are cold.
  • After cleaning the stove, make sure to anchor the cooking rack securely in the slots provided.

IN CASE OF FIRE!

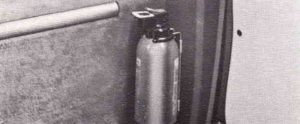
The dry chemical fire extinguisher is located behind the passenger seat.

  • Release fire extinguisher from holding bracket.
  • Remove the tape over the white discharge button.
  • Hold the fire extinguisher upright and press the button all the way down.

Aim the spray at the base of the flame. Do not test the fire extinguisher. Partial discharge may cause the contents to leak.

Product Review: Thermos Sipp Travel Mug

This sleek stainless steel 16-ounce travel mug with leak-proof lid keeps drinks hot and cold for hours.

Specifications

Dimensions: 3.5 Dia x 5 Dia x 8 Height inches (89 x 127 x 203 MM)
Capacity: 16 fluid ounces (470 ml)

  • Keeps liquids hot for 5 hours and cold for 9 hours
  • Leak-proof lid with one-hand push-button operation
  • Lid is BPA-free and has a built- in tea hook for tea bags or most loose-leaf infusers
  • Cleans easily

On a long road trip, especially if you’re starting early each day or driving late, a caffeinated beverage is often your best companion. You know, after your actual travelling companion …

And a dependable travel mug is a crucial component of that caffeine-delivery system, one that keeps hot stuff hot, or cold stuff cold, as needed. One that doesn’t leak or spill, and which feels good in the hand. We’ve gone through a few mugs over the years of Westy travelling, in a variety of materials and shapes and prices. And we’ve frequently been disappointed after a while, for one reason or another.

But, like finding the perfect roadtrippin’ partner, I think we may have found The One.

Get the Thermos Sipp here

First Impressions

Thermos has been making vacuum-insulated beverage flasks for over 100 years, and they know their stuff. Their Sipp travel mugs are tall, slim, stainless steel flasks, narrow at the bottom and tapering to a wider top, and they fit well in your hand.

The screw-on plastic lid has an integrated valve operated by a small button, which securely seals the beverage inside to prevent spilling or heat loss.

On The Road or In Camp

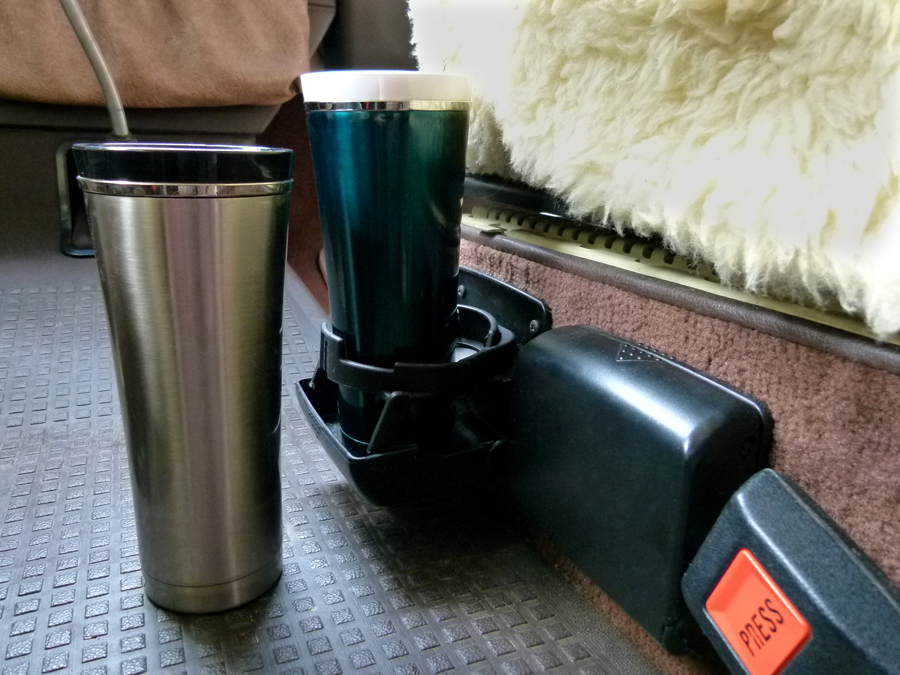
The Thermos Sipp fits well in nearly all beverage holders, and is a perfect match for our Sports Imports Folding Cup Holders. When travelling, it’s easy to grab, depress the push button, and sip your favorite beverage.

The Sipp keeps coffee scaldingly hot for a couple of hours, and amazingly drinkable for a couple hours more. Cold beverages stay cold even longer.

Though tall and potentially top heavy when full, the Sipp has never toppled out of our cup holders, and even when knocked over on a picnic table the sealed lid prevents spills.


The Sipp is available with or without a handle, and comes in six colors. Most colors include a white lid, but the Silver model comes with a Black lid, which can sometimes make it difficult to see the two sipping slots. I simply marked my lid with a Sharpie, to prevent embarrassing dribbles.

Cleanup is easy with a good wash and rinse, though the underside of the lid’s valve will benefit from a periodic disassembly and a thorough cleaning, especially if you often enjoy cream, flavored coffees, or sugary beverages.

In The Long Run

We’ve been using our Thermos Sipps for a few years now, for Westy travelling and for everyday driving. I even use mine for multi-day kayak-camping trips, the no-leak lid allowing me to carry hot coffee ready at hand, strapped to my foredeck.

Setting out for a day of windshield touring, we can easily make it all morning with two steaming mugs of coffee or tea, and the Sipp’s no-spill design is perfectly suited for the rough-and-tumble environment of a camper van.

On those long driving days, the Thermos Sipp travel mug is the perfect travelling companion!

Hits: keeps beverages hot and cold for hours, stylish design fits well in hand, no-spill lid, easy cleaning
Misses: can be somewhat tippy when full, lid valve requires periodic disassembly for cleaning

Get the Thermos Sipp here