Camp Westfalia

Archive for Workshop – Page 2

Replacing the Vanagon Rear Hatch Struts

Here’s how to fix your van’s rear hatch if it won’t stay up or is difficult to open

If you (or more correctly, your van) has been suffering from a loose posterior opening (ahem), you probably need a new pair of hatch strut lift shocks.

In a pinch while traveling or camping, you can fashion a short length of one-inch-diameter firewood or similar to serve as a prop between the hatch door frame and the end of the shock portion of the strut.

But the correct fix, easy and affordable, is to replace the two hatch struts. We’ll start by propping up the open hatch, removing the old struts, and installing the new.

Parts & Materials

  • Two hatch struts
  • Steel wool
  • WD-40 or all-purpose cleaner
  • All-purpose auto grease

Optional Parts:

  • E-clips, .25″ (6 mm) diameter, (qty. 2)

Tools

  • Flat Screwdrivers; medium, small, and very small
  • Pliers

Step 1: Removal

Open the hatch and if necessary prop it up with a 2×4 about 6-7 feet long, a broom handle wedged against the bumper, or an indulgent spouse. Before beginning to remove the old struts, double check the correct length of your new struts by holding them up alongside the old ones. The new struts may be up to 1/2″ longer, as the old ones are likely compressed and worn.

If your hatch is secure, you can remove and replace both struts together, or replace first one then the other.

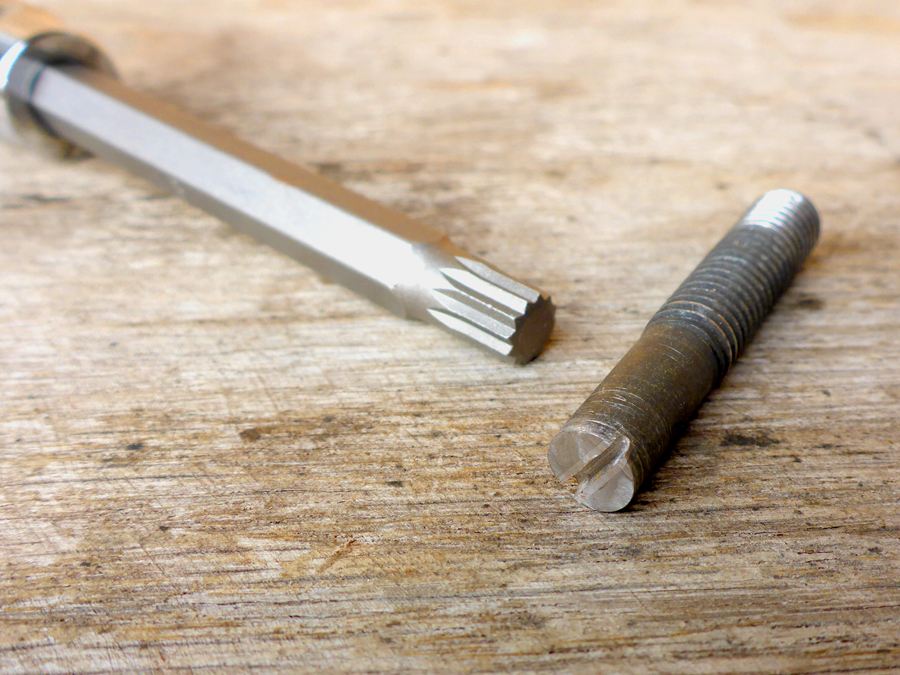
Use an old screwdriver to loosen the safety clip on the top end of the strut attached to the raised hatch; you shouldn’t have to entirely remove the clip, but only loosen it. Once loosened, pull that end of the strut outward to pop it off of the ball stud. Let the strut dangle.

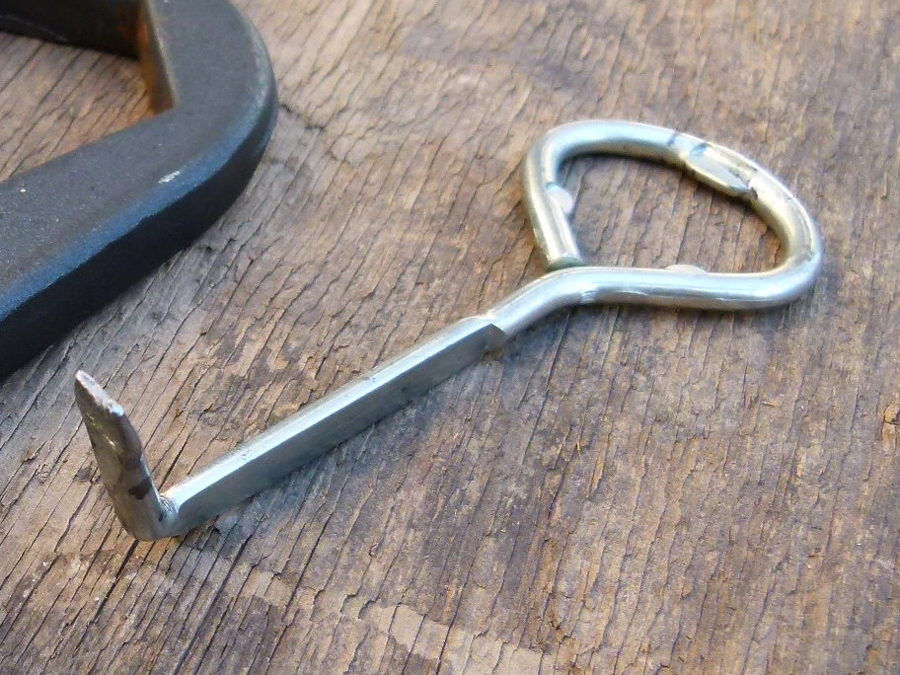
The other end of the strut has a simple flat rod end, attached to a pivot post on the door frame. The rod end is held onto the post by a small E-clip retaining ring and a couple of washers. Carefully pry this E-ring off the post using a very small screwdriver.

If you’re smart, you’ll first cover the E-clip with your hand or a shop rag to catch it when it pops off. If, instead, you’re like me, you’ll spend twenty minutes on your hands and knees searching the barn floor for the errant E-clip before finally driving to the hardware store for a new one. Ask the nice man there for a 1/4″ or 6 mm E-clip …

Remove and save both the rubber and steel washers, then remove the old strut. Both the ball stud and the pivot post will likely be dirty and rusted, so clean them up with WD-40 and a bit of fine steel wool. Apply a bit of grease to both.

Step 2: Installation

Installation is the reverse of removal. You’ll have an easier time installing the new strut if you first attach the end on the door frame pivot post; slip it over the post, add the rubber and the steel washers, then carefully press the E-ring onto the post using pliers.

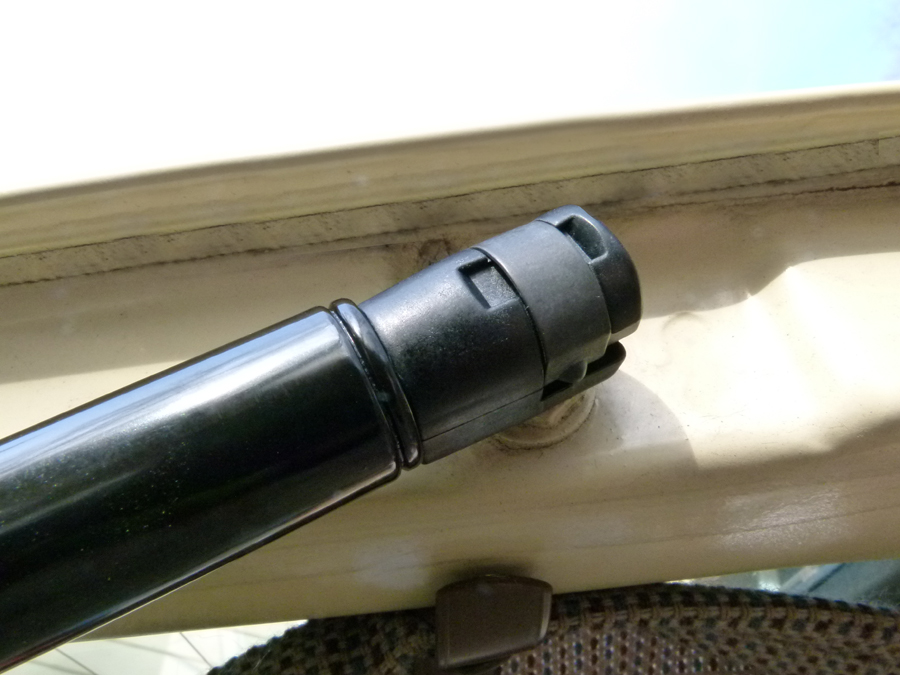
At the hatch end of the new strut, check that the ball socket is aligned with the ball stud. If not, carefully twist the black body of the strut clockwise (as if tightening a nut onto a bolt) until the socket aligns with the ball. They usually snap into place with only a firm push; but you may need to loosen the safety clip to allow it to connect.

If the strut seems too long to fit, you may have to lift the supported hatch a bit higher, or forcefully compress the strut until it can be snapped into place.

Remove the temporary hatch support (or spouse) and carefully lower the hatch to close it. The first few times with new struts can be difficult until they wear in somewhat, but they should improve over time.

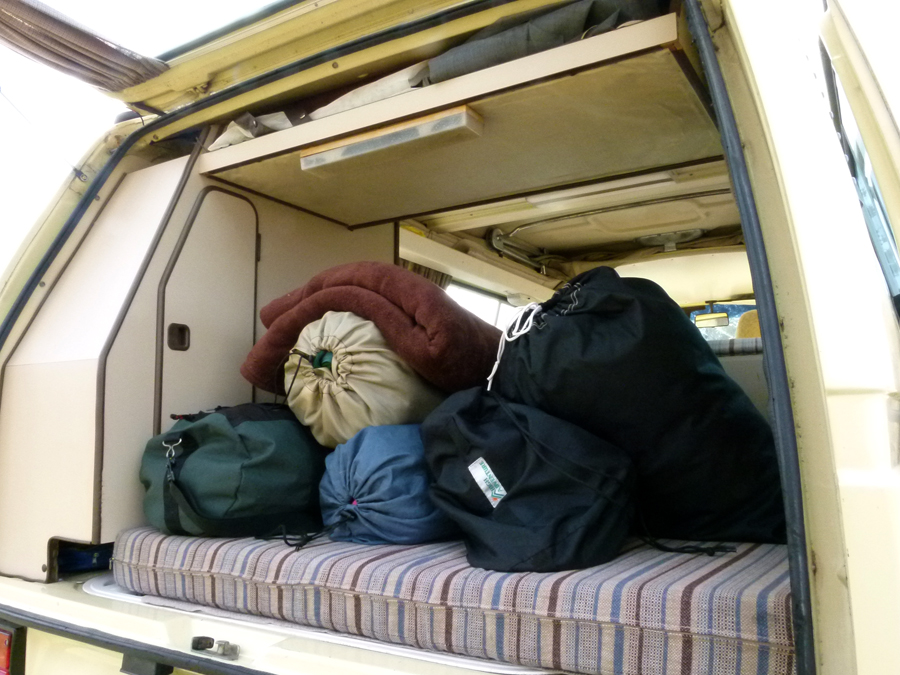
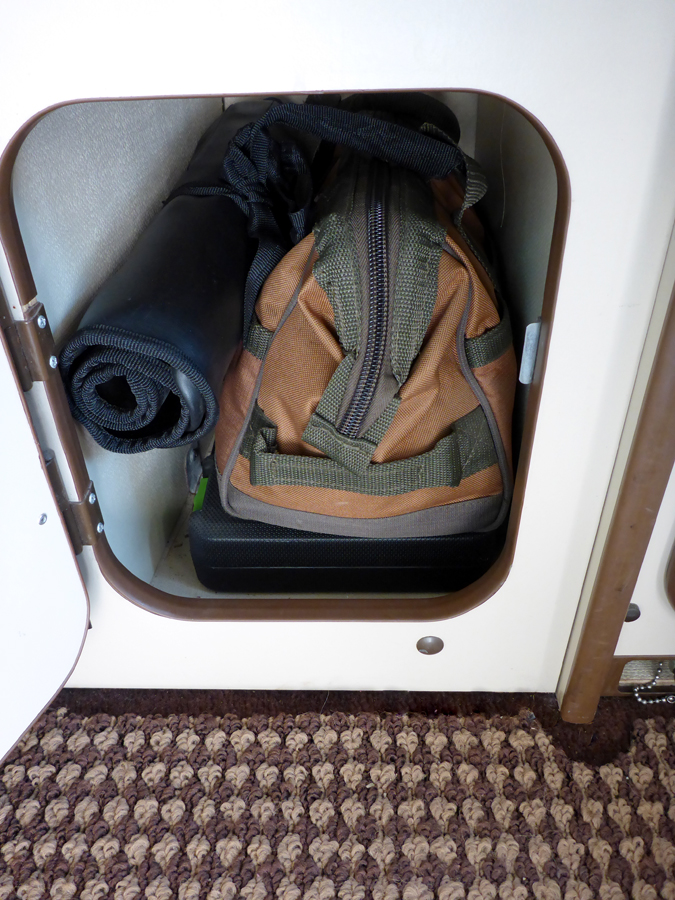
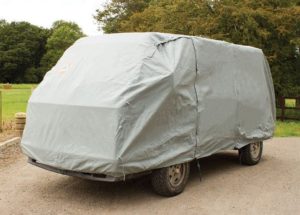
Packing for the Road

You’ll love how easily your Vanagon hatch now opens, and more importantly, stays open …

Have any questions, tips, or suggestions? Post ’em below, and use the buttons to share with your friends!

Diesel Vanagon Coolant Expansion Tank Bracket

The mounting bracket for the stock coolant expansion tank on a 1983 diesel Vanagon is prone to forming stress cracks and leaks in the plastic tank, due to the way it attaches to the bulkhead just forward of the battery platform.

During the course of an engine replacement, I upgraded to a complete set of silicone coolant hoses. These new hose diameters necessitate using a coolant expansion tank for the 1983-85 gasoline Vanagons. While these tanks are of a better design and more readily available, they will not fit into the stock 1983 diesel mounting bracket.

So I took the opportunity to further improve things using a tank mounting bracket from Van Cafe/Rocky Mountain Westy. This design provides better support for the tank, eliminating the stress cracks.

Unfortunately, the original tank mounting flanges on the bulkhead interfere with the surface mounting of the new bracket. I suppose one could simply bend and hammer these flanges flat, but I generally avoid such permanent modifications and molestations to original bodywork.

So I fabricated a short standoff to fit between the flanges on the bulkhead, and to extend the mounting surface. I made a few extras, so if you’re making this upgrade to your diesel Vanagon, this will help.

Install the bracket with standoff, mount your new coolant expansion tank in the bracket, and connect your hoses!

Get it here!

Got a comment or question? Post ’em up below!


Your Emergency On-Board Vanagon Tool Kit

How to put together a complete emergency tool kit for your Vanagon, Transporter, or Bus

Every tool is a hammer, except for a screwdriver, which is a chisel.
Perales, Samba member

You’ve spent the better part of the spring (and no small amount of cash) repairing, maintaining, and restoring your Vanagon or Bus, preparing it for The Big Summer Road Trip.

Now, here you sit on the gravel shoulder or in a remote campsite, with a squealing V-belt. Or a water pump that’s no longer pumping water. Or an alternator that’s no longer pumping electrons …

Ultimately, preventative maintenance is really the best tool. So, ideally you will never need to turn a wrench while traveling. But, as we all know, things happen.

So, it’s good to have some tools at hand to perform such emergency repairs, adjustments, or other tweaks your Vanagon may need while on the road. Or to fix other camping gear while traveling.

How many tools, and what kinds?

Some carefree souls venture forth with only a cell phone, a AAA card, and groovy vibes. Other Nervous Nellies pack their vans with a complete workshop of tools and spare parts, like an overloaded covered wagon on the Oregon Trail, to prepare for every possible contingency.

Much of your decision will be determined by your situation, of course. If your Vanagon is used primarily as a daily driver around town, you’re probably seldom more than 5-10 miles from home, so you can carry little more than a spare tire and a lug wrench. If, on the other hand, you’re driving to the ends of the earth, you’ll probably pack your van to bursting with parts and tools, with little room left for a spare pair of socks.

If you find yourself somewhere in between, mainly driving thousand-mile road trips in adjacent states, this will inform your choice of onboard supplies. You’ll need to decide for yourself how much risk you can comfortably bear.

Generally, my main objective is to have 90% of the tools needed for 90% of the repairs I’m likely to encounter while traveling.

Many of these tools you may already have at home, so you’ll need to decide whether to move them to your van for each big trip, or buy duplicates.

Below is my personal list, based on many years of road tripping in a succession of old vehicles, and a certain Teutonic penchant for thoroughness. Some may wonder, “Where do you put all that stuff?” while others will chide, “I can’t believe you forgot the  < insert one more thing here > !”

The Whole Package

I carry these tools in a variety of packs. The socket set is neatly contained in the included compact plastic carry case. A tool roll conveniently keeps all my wrenches in order; and a heavy duty fabric tool bag holds almost everything else and expands & contracts as needed. Only a few large and heavy tools ride loosely under the bench seat: the factory jack, RV levelers, jumper cables, and breaker bars.

Except as noted, all tools are metric, of course.


The Tools

The Bentley Manual

It should go without saying that you should never wander too far from home without this Holy Book of Vanagon repair and maintenance. Even if you’ve already memorized all 724 pages, this mighty tome also functions as a wheel chock.

For good measure, I also carry a tattered copy of the classic “Zen and the Art of Motorcycle Maintenance” to remind me of the more metaphysical aspects of mechanicking, and as a mild sleep aid when loafing in the hammock.

Sockets & Ratchets


Wrenches

Screwdrivers


Pliers

Electrical

Miscellaneous Small Tools

  • Latex work gloves
  • GoJo hand cleaner wipes, small packet
  • LED headlamp
  • Magnetic work light
  • Sharpie marker
  • Utility knife
  • Small inspection mirror
  • Butane lighter
  • Small tape measure
  • Leatherman-type multi-tool
  • Hacksaw
  • Ball-peen hammer
  • Assorted sandpaper & emery cloth

Vanagon-Specific Tools

If you are not capable of performing a particular emergency repair and have to take your van to an independent mechanic’s garage, a freeway truck stop, or Ye Olde Tyme Blacksmith’s Shoppe, they may not have some of these unusual tools. But if you can provide them, they can get you on the road sooner.


A Few Homemade Custom Tools

Over the years I’ve fabricated a few small tools which have come in handy for routine maintenance or emergencies.

Mini Jumper-Cables

Before discarding that next old, frayed six-foot extension cord, snip the plugs off both ends and add two pairs of Red and Black alligator clips (be sure to keep the correct polarity on both ends).

No, these are not suitable for jumping your Vanagon’s dead starting battery. But they’re great for testing & bypassing various automotive circuits, rigging up test lights, and any number of other electrical tasks. A common use is simple hands-free connection of your voltmeter to the circuit you’re testing.

I was once caught in a torrential rainstorm, and found my windshield wipers suddenly inoperative. I parked under the shelter of a gas station awning and used these mini jumpers to bypass the faulty stalk switch and instead operate my wipers using the steering wheel’s horn button.

CV Joint Alignment Tool

Whether at home or abroad, if you’ve ever replaced a CV joint or axle, you know how difficult it can be to hold the axle in place while you install the first bolt. Get an M8x48 bolt from the hardware store (or just use an old CV bolt) and cut the head off, then cut a slot into the same end of the bolt so you can insert a flat screwdriver. Thread this ‘alignment tool’ into the uppermost hole in the drive flange of the transaxle or wheel hub, then slip the axle’s CV joint over the protruding tool. The axle will hang in position while you install the proper bolts; use a screwdriver to remove the tool, then install the final bolt.

The same tool also works in similar fashion for installing Vanagon diesel V-belt pulley sheaves.

Brake Spoon

Vanagon rear brakes rely on an internal ‘star wheel’ ratchet mechanism for proper adjustment, but this adjustor can be difficult to reach using common brake spoon tools. But, you can fashion one from an old paint can opener.

First, use a large pliers to bend the tip of the opener’s blade flat, like a screwdriver. Then clamp the tool in a vise or a large pair of channel-lock pliers and use another pliers to bend an angle of about 80 degrees in the tool, just above the blade portion.

To use the tool, simply grasp the handle in the palm of your hand and reach in behind the rear wheel. Insert the tip of the tool in the access hole in the brake backing plate and find the teeth on the ratchet ‘star’ wheel. Pressing firmly, use the tool to dial the star wheel up or down as needed.

With practice (ask me how I know), you can pull over and easily make this adjustment within seconds, then hit the road for further brake testing until you get it right. Oh, what an enjoyable way to spend one’s first day of cross-country vacation after a recent brake job …

Bonus: many such paint can openers feature an integrated bottle opener in the handle, so you can enjoy an adult beverage while admiring your work.

Return to Top

With a good onboard tool kit, and a little know-how, you’ll be ready for just about anything the Road to Adventure can throw at you!

What do you think? Leave a question or comment below, and use the social links to share with friends!

Winterize Your Westfalia for Storage

How to put your Vanagon Westfalia Camper Van to bed for the winter or off-season

You’ve hopefully just completed a long happy summer of road tripping in your camper van, with all the memories and Facebook moments that come with it.

But if your van resides in the cold northern tier of snow, ice, or perpetually rainy days, and especially if it lives in one of the Rust Belt states which use copious quantities of vehicle-eating road salt, you’ll want to tuck your van safely away until next Spring.

Keep it Clean

Now is a great time to give your Westfalia a good cleaning, though some owners prefer to do it first thing in the Spring (see “Preparing Your Vanagon Westfalia for Summer”).

The onboard water tank should of course be emptied, rinsed, and well drained after each camping outing. But it’s also wise to give it an annual cleaning before or after off-season storage:

  1. Add 1/4 cup of household bleach to one gallon of water, and pour this mixture into the water tank, either through the exterior filler port or through the large cap on the top of the tank.
  2. Continue filling the tank with fresh water, then run the sink faucet until you can smell bleach-water at the faucet to indicate that the entire supply line is primed.
  3. Let it sit for at least 12 hours to fully sanitize the system, then drain the tank and re-fill with fresh water.
  4. Run the faucet again until bleach can no longer be smelled, then drain the tank.

Don’t Freeze Up

If you live in a region which experiences freezing temperatures, water left in your Westfalia’s supply line and sink drain trap can freeze and expand, damaging or cracking these components. To prevent this, use a commercially available Marine & RV Water System Antifreeze
(NOTE: This special RV Antifreeze is a non-toxic, food-grade formula and can safely be used in drinking water systems. Do NOT use standard automotive engine coolant antifreeze, which is poisonous.)

  1. Pour a half-gallon or so of the RV Antifreeze into the supply tank and run the faucet pump until you see the pink Antifreeze running down the drain.
  2. Drain the remaining Antifreeze from the tank (you can catch and save it back into the jug using a funnel).
  3. Leave the Antifreeze in the system all winter to protect your supply line and drain, then rinse thoroughly with fresh water in the Spring before using.

If you didn’t do so after your last camping trip, be sure to close the main shutoff valve on your LP tank.

If parking your camper van for several weeks during the winter, it’s a good idea to prevent fuel problems with a quality fuel stabilizer for your specific type of fuel: gasoline/petrol, or diesel. These additives will prevent corrosion from moisture and the build up of varnish. Diesel additives also help prevent bacteria, fungus and algae. If the formula you choose does not include a component to prevent fuel gelling or freezing, you can also include a fuel-line antifreeze for your specific type of fuel.

After pouring the additive(s) into your fuel tank, start and run the engine for a few minutes to ensure that it’s circulated throughout the fuel tank, lines, filters, and pump, then turn the engine off.

If you haven’t done so recently as part of your regular maintenance schedule, change your Vanagon’s motor oil and filter, to prevent accumulated moisture and acids from harming your engine internals.

Remove any supplies which are perishable or which can be damaged by freezing: canned goods or other food, etc..

Out, Mouse!

Remove anything from your camper van that may attract mice. For whatever reason, Vanagons are notoriously easily infiltrated by these vexing vermin, and you don’t want to invite them. Food, candy, snacks, even paper tissues, napkins, and other tempting nesting materials should be taken out of your Westfalia for the off season. You may even want to deploy mouse traps, or use cotton balls doused with peppermint oil throughout your van to repel them.

Get Charged Up

Seasonal Vanagon Westfalia MaintenanceIf your van will not be driven for more than 2-3 weeks, a trickle or maintenance charger should be used to keep the battery(s) near full charge state while parked, either in the van or indoors. A lead-acid automotive battery will generally discharge about one percent per day, even if not used. Add to this any parasitic battery drain from stereos, clocks, or other devices, and you can quickly ruin even a new battery.

If parking your Vanagon for a couple of months during the winter it’s a good idea to remove the starting (and optional auxiliary) battery from the van each fall and bring them indoors. Use a quality automated maintenance charger to keep them topped up throughout the winter months.

Safety First

Check that your fire extinguisher’s pressure gauge is in the green, and turn it upside-down to give it a few hearty shakes to loosen any compacted agent powder.

Go Undercover

Park your Vanagon in a garage or beneath a carport during the off season, if possible. If not, there are still some things you can do to protect your van.

vanagon-wheel-coversMany Vanagons are used only seasonally or for special trips, so their tires can age/degrade long before they are worn. Protect your Vanagon tires from the UV rays of the sun during the winter and between camping trips with easy-on, easy-off RV wheel covers. You’ll want covers which fit tires from 24-26.5” in overall diameter.

For all the same reasons and more, a quality full-vehicle cover for your Vanagon is important if stored outdoors. A good cover will protect your van’s paint, rubber window seals and plastic trim pieces, and even the interior upholstery from the sun’s harmful UV.

A good cover will help keep rain, snow, and airborne crud off your van while parked, but you should look for a cover made of a breathable fabric, so that moisture is not trapped beneath the cover where it can damage the paintwork.

Van covers range in price and in material, with more expensive covers generally being more durable and breathable, and sometimes including additional features like door access zippers. With or without a cover, you should periodically open your Vanagon’s windows or doors on clear dry days to allow any accumulated humidity or moisture to vent, to prevent mold and mildew.

A special precaution is called for in the northern tier: keeping your van’s roof generally free of snow. It’s not easy to collect enough snow up there to damage the Vanagon or Westfalia roof structure, but accumulated snow and ice can create a cold thermal mass which will cause humidity inside the van to condense on the underside of the roof, just like a cold beer from the fridge. This moisture can lead to the growth of unhealthy and unsightly black mold or mildew inside your van roof, and even deteriorate the Westfalia canvas. So keep the snow off, and occasionally air it out.

Follow these tips to keep your Vanagon in tip-top shape during the off season, and it will be ready for another summer of adventures!

What do you think? How do you winterize your camper van? Leave a question or comment below, and use the social buttons to share with your friends!

Replace the Vanagon Cigarette Lighter with a USB Port

Update your loose lighter socket (and optional DIN socket) with modern 12-volt power and USB ports

Many early-1980s Vanagon dashboard cigarette lighter sockets are slightly larger than North American plugs, making for a sloppy fit when using modern 12-volt phone chargers, lights, dashboard fans and other accessories.

In addition, some Vanagons are also equipped with a DIN receptacle, a small enigmatic electrical ‘silver socket’ similarly mounted to the dashboard near the glovebox, and commonly used in Europe for 12-volt accessories. Sadly, accessories which can utilize this DIN plug are nearly impossible to find in North America, so the socket typically goes unused here.

Fortunately, both these power sockets can be rather easily updated with better fitting and more useful modern sockets; I opted for one standard cigarette-lighter socket, plus a modern dual-USB port for charging digital devices. Both sockets are close enough to the glovebox that charging cords can easily be routed to your electronic toys even when safely tucked away inside the glovebox.

We’ll start by removing the original sockets, enlarging the mounting holes in the dashboard, adding new connectors to the existing wiring, then finish by mounting the new sockets.

PARTS & MATERIALS

TOOLS

  • flat-bladed screwdriver, very small
  • electrical wire cutter/stripper/crimper

Optional Tools:

Such power sockets can see heavy usage in a Camper, requiring extra durability, so I selected a matched pair of heavy-duty marine outlets designed for use in boats. These outlets included optional heavy-duty mounting plates and snap-in water-resistant rubber covers, both of which I found to be unnecessary.

Step 1: Remove old cigarette lighter socket

As always, when working on a vehicle’s electrical system, disconnect the battery to prevent shorts and shocks. If your Vanagon is equipped with a second (auxiliary) battery, disconnect this, too.

It will be helpful to completely remove the glovebox from the van, so empty it out and unclip the two plastic retaining straps located in the front corners; pivot the glovebox completely downward until it can be disengaged from the hinge bracket and removed.


Reach up beneath the dashboard and wriggle loose the plastic wiring connector from the back of the cigarette-lighter socket.

To remove the original cigarette lighter from the dashboard, insert a very small screwdriver into the socket and carefully pry loose the two metal tabs locking the metal inner portion of the socket to the plastic outer surround. The metal socket must be removed first, allowing the plastic ring to follow.

Step 2: Enlarge mounting hole

Try fitting the new cigarette-lighter socket into the mounting hole; if it fits, you’re good to proceed. Mine was too large so I needed to enlarge the hole in my dash using a small handheld Dremel motor tool and a grinding bit. I recommend covering the seats and floor with plastic sheeting to catch the inevitable metal chips while grinding or drilling.

Step 3: Connect wires to new power socket

Fish the wiring connector out through the mounting hole and carefully cut the connector from the wires.

Depending on the model year of your Vanagon, you may have a variety of wiring configurations; in general, there should be two Brown ground wires, one or two Red Positive wires, and possibly a Blue wire for the optional green illuminated surround.

When rewiring the new cigarette-lighter socket, keep the Brown ground wires together, and utilize the same Red wire(s) for the power supply. If your new socket includes an illumination feature, utilize the Blue wire for this; if not, be sure to securely cap off this wire with a wire nut or electrical tape.

Strip the wire ends, insert them in their respective fully-insulated female spade connectors, and crimp securely.

Step 4: Mount new power socket

Prepare to mount the new socket by reaching within the dash and slipping the locking retaining ring over all the power wires.

Draw the wires back out through the mounting hole and connect all the wires to their respective spade terminals on the back of the new socket: Red to (+) Positive, Brown grounds to (-) Negative, and Blue to optional illumination terminal.

Insert the new socket into the mounting hole, be sure it is oriented straight, then thread the retaining ring onto the back of the socket from behind the dash; tighten securely.

If only replacing the cigarette-lighter socket, reconnect the vehicle batteries and test the new power socket.

Your van may also have an unused European DIN socket, or you may simply wish to install an additional power or USB socket; leave the batteries disconnected and continue below:

Step 5: Replace DIN power socket

The European DIN socket utilizes its own independent power supply, but replacing it is nearly identical to the cigarette-lighter socket above except for a few notable differences:

a. The DIN socket is mounted to the dash using a retaining nut which must be removed using a 22mm deep socket from behind the dash
b. The DIN socket’s mounting hole is only about .75″ (19mm), so you’ll need to enlarge the mounting hole quite a bit to fit a new socket.
c. Originally, the DIN socket is grounded via the metal dash structure, so you will find only a single (+) Positive power supply wire. When replacing it with a new power socket, I suggest improving this by running a dedicated ground wire to one of the crown-shaped grounding points mounted to the vehicle chassis, located behind the dash near the driver’s left knee.

As mentioned above, this space can accept a second conventional cigarette-lighter socket, or a modern USB port; I chose a slick double-USB port for maximum charging capabilities.


I used a step bit designed for neatly drilling large holes in sheet metal, which worked quite well. First, measure the outside diameter of the shank of your new USB socket (in my case, approx. 1.125″ or 29-30mm), then find the corresponding ‘step’ on the drill bit. Wrap a section of tape around the bit to mark the proper depth to avoid drilling too deep/wide. When done drilling, smooth the hole edges using the Dremel grinding bit or emery cloth.

Install the second new socket as outlined above, utilizing the original wiring, then reconnect the vehicle batteries and test the new power sockets.


After a few camping trips with our new power sockets, we couldn’t be happier. Cigarette-lighter-type power plugs now remain firmly connected and no longer rattle loose, and the double USB power socket keeps all our electronic devices powered up while travelling.

This simple, affordable project is an easy way to modernize the ill-fitting or outdated power sockets of your classic Vanagon!

What do you think? Leave a question or comment below, and use the buttons to share with your friends!

Replacing the Westfalia Tent Window Screen

How to replace the torn or tattered window screen in your Volkswagen Westfalia Camper popup tent

After many miles and many years of camping, the insect screen in the popup tent window of your campervan can turn old and brittle. It will eventually start splitting and crumbling apart, allowing pesky bugs into your cozy abode.

Fortunately, for a few dollar’s worth of materials and a bit of time, you can easily replace your old screen with a new one, without special tools or the need to completely remove the tent from the van.

First, you’ll carefully remove the shreds of your tattered old screen, pin a complete section of new screen into the window ‘frame’, then stitch it all into place before trimming the edges.

This can all be done while standing in the van with the top popped, though it may be helpful to do some bits while sitting in the overhead luggage rack.

NOTE: if your old screen is merely torn in a few spots and worth salvaging, you can use a curved sewing needle to ‘suture’ the wounds closed. Use a synthetic thread the same color as your screen to stitch first horizontally then vertically, to ‘weave’ new thread over the tear.

Materials & Tools


Step 1: Remove the old screen

Westfalia-tent-replacement-screen-trim-edges2Raise your popup roof and unzip/open the canvas window to expose the window screen. Roll and tie or clip the canvas window flap out of the way. If working from the interior, unzip the screen and allow it to hang down into the van where you can easily work on it.

Use the scissors to carefully cut the old screening material from the ‘frame’ which fastens it to the zipper, trimming as close to the edge as possible. Carefully do the same along the bottom edge. It may help to start by roughly cutting the entire center section of screen out, then finish by trimming out to the edges.

Once removed, close the screen zipper again.

Step 2: Attach bottom edge of new screen


Cut a section of new screen from the roll, about 42W x 26H”. Use a marker to mark the centers of the top and bottom edges of the screen, to help with alignment during the installation.

Lay the new screen into the window opening, allowing it to hang down into the van. Standing on a short stool or step ladder, peer outside and align the bottom edge of the screen with the bottom edge of the exterior lower seam, for a clean, factory appearance. Pin it firmly into place for stitching.

In general, on this project I simply used the needle to draw the new thread through the existing factory stitches, to avoid adding new needle holes and to utilize the original stitches as a guide for a straight line.

Start by first stitching a simple vertical back stitch at one end of the seam, to reinforce the end of your stitch, then begin stitching along the bottom seam. I used a simple running & basting stitch, with shorter stitches on the inside and double-length stitches on the exterior to help fasten the screen to the canvas. About every tenth stitch, double back on your stitch, then continue, to strengthen the stitch and prevent unraveling.

Continue along the entire bottom edge like this, ensuring the screen remains straight and aligned with the factory seam, then end the stitch using another bar tack.

Step 3: Continue attaching entire screen


The next step is most easily done from outside the van, while sitting in the rooftop luggage rack, though one can improvise and work from the interior.

Grasping the top-center of the canvas window frame, pull the canvas downward, then pull the new screen upward to meet it and draw it taut. Tuck the screen up under the exterior flap which covers the zipper, then back out to the front; use several pins or binder clips to fasten the new screen into the opening.

Working your way from the center to the left or right, repeat, clipping or pinning all the way around the ‘frame’, ensuring as you go that the screen remains taut and smooth.

Once in place, unpin/unclip the upper-right (passenger-side) corner of the screen to allow you to reach through to the outside in order to make your return stitches. You can now continue stitching from outside or from back inside the van.

Starting in the lower-left (driver-side) corner of the window frame, begin stitching the screen to the zipper tape of the window ‘frame’. Again, start with a bar tack reinforcement, then begin a running stitch upward, reaching out through the open corner of the window to grab the needle and run it back through the tape and inside.

You’ll want to keep your stitches as close to the inner edge of the zipper tape as possible, in order to avoid the final trimmed edge of the screen interfering/snagging with the zipper pull later.

When you reach the top-center of the window frame, re-pin/clip the upper-right (passenger-side) section of the screen to the frame and draw it taut. Now that the left/driver’s half of the screen is firmly stitched into place you can unzip the lower-left (drivers-side) portion to allow exterior access for stitching. Continue stitching the rest of the way around the window frame to the lower-right (passenger-side) corner, ending with a final bar tack.

Step 4: Trim excess screen, finish


Once stitched into place, you can remove all pins/clips and re-zip the entire screen to check for tautness.

If all looks well, trim the excess screen to prevent the trimmed edge from interfering with the zipper pull. This is best done from outside, but can also be done from the interior by simply unzipping the entire screen and allowing it to hang down into the van.

In the lower corners where the screen transitions from beneath the zipper flap to the exterior bottom seam, I trimmed the screen at 45-degree angles for a neat appearance.

Test the zipper a few times to make sure it does not snag on the edges of the new screen. Now would also be a good opportunity to clean and lubricate both tent zippers.

This simple repair handily replaces your tattered old Westfalia insect screen, and helps keep your van tent working well for many more years of camping!

Have any questions, tips, or suggestions? Post ’em below, and use the buttons to share with your friends!

Preparing Your Vanagon Westfalia for Summer

How to get your Vanagon Westfalia Camper Van ready for summer road-tripping and camping

“Spring has sprung. The grass is riz. I wonder where dem campers is?”
Paraphrased from Frederic Ogden Nash

If your camper van is anything like mine it probably spends its winters tucked safely away in a big red barn, or maybe in a garage or under a protective cover, or perhaps in the great outdoors (see “Winterize Your Westfalia for Storage”).

But now spring is in the air: the bees are buzzing, the meadowlarks are … larking, and campers are eager to begin a new season of outdoor living. Ironically, storage can be hard on things made to move; batteries can run down, fluids leak, and joints and mechanisms stiffen.

And that’s just the driver!

So before we hit the road, let’s get our Vanagons ready for another summer of safe, comfortable, enjoyable journeys.

A Springtime Checklist

Get Some Fresh Air
Start by opening all the doors or windows, and popping the Westfalia top, to vent the stale months-old air and to allow any humidity or moisture to dissipate. Inspect the underside of the fiberglass popup roof and the canvas for signs of mildew or rot.

Take a Good Look
Visually inspect the van inside and out, looking for evidence of rain leaks and fluid leaks: coolant, motor oil, transaxle oil, brake fluid, etc.. Check the reservoir levels of all these same fluids, and top them up if needed. If you use protective tire covers remove them now; check the tires for proper inflation and inspect them for weather checking, including the spare tire.

Battery-DocGet Charged Up
If your Vanagon was not used much during the winter, you probably brought your batteries indoors in the fall and used a quality automated maintenance charger to keep them topped up throughout the winter months. Reinstall now in the spring.

Shakedown Cruise
Once everything checks out and you’ve installed the batteries, go ahead and fire it up. Watch for any smoke or fluid leaks, and listen for unusual sounds. While warming up, have a partner help you check all the exterior lights (headlights, turn signals, brakes, etc.). Take the van out for a spin and a road test, checking that the steering, brakes, and shifting work properly.

Meguiars Marine_RV Fiberglass Restoration SystemWash, Wax, and Wacuum
On your way home, stop at a self-service car wash offering a high-pressure underbody flush to wash any lingering dirt or road salt. Once home, give your van a thorough hand washing top to bottom with a quality car-wash soap, followed by a hand waxing. This gives you an opportunity to inspect the body and paintwork, and protects your finish from harmful summer UV rays. Use a quality RV or marine polish and wax on your fiberglass Westfalia roof.

If you didn’t vacuum and clean your Vanagon’s interior before parking it for the winter, do it now. Use a carpet deodorizer and a heavy-duty fabric refresher to eliminate odors. Vacuum the upholstery, followed by any other detailing inside and out. Polish and protect the dashboard and other vinyl areas with wipe-on or spray products designed for these surfaces.

Remove any mouse deterrents or traps from the van.

Safety First
Replace the batteries in your smoke- and carbon-monoxide detectors. Check that your fire extinguisher’s pressure gauge is in the green, and turn it upside-down to give it a few hearty shakes to loosen any compacted agent powder.

Everything AND the Kitchen Sink
If your van is a full Westfalia model, test all the camper appliances. Half-fill the onboard water tank and test the kitchen sink faucet. If you used RV Antifreeze in your water-supply system to prevent freeze damage, rinse and flush it out now.

Be sure to open the main valve on the LP tank, then light both burners on the stove to prime the supply lines. The Westfalia refrigerator generally is easier to ignite on LP if it has first been pre-chilled on 120-volt AC house current several hours or overnight. Follow the starting procedure in the owner’s manual to ignite the fridge.

Mr-Heater-Little-BuddyIf you use electric or LP space heaters for camping during the Winter or the shoulder seasons of early Spring and late Fall, test them now to ensure they’ll work when you need them.

Let’s Go!
Restock the van with any camping equipment, automotive supplies & tools, or other provisions you removed in the fall. Once you have your Vanagon recommissioned for duty, all you need is a tank of fuel, a cold six-pack, and an adventurous attitude.

See you on the highway!

What do you think? Leave a question or comment below, and use the social buttons to share with your friends!

Vanagon Clutch Slave Cylinder Replacement

Related Topics:

Hydraulic Clutch System Overview
Clutch Master Cylinder Replacement
Bleeding the Clutch Hydraulic System

Vanagon Clutch Slave Cylinder

  1. Back in the left-forward corner of the engine compartment, just ahead of the edge of the deck-lid opening, you will find the clutch slave cylinder mounted to the clutch housing. Start by using some WD-40 and a shop rag to clean loose crud from the area, especially around the union nut on the steel high-pressure line entering the front of the slave cylinder. The introduction of dirt or other crud into your hydraulic system here or anywhere else will soon mean trouble. When clean, loosen but do not completely remove the union nut.
  2. Loosen the two retaining bolts attaching the slave cylinder to its mounting bracket. If yours are rusted and seized, and the penetrating oil hasn’t worked, you may need to use the propane torch to carefully apply some heat to them. NOTE: be very careful to not damage nearby wires or coolant hoses.
    Use an open-end wrench to hold the bolt heads from beneath the bracket, while using a socket and ratchet to loosen the nuts from above. Alternatively, you may find you have better access while lying beneath the van.
    Completely detach the high-pressure line from the slave cylinder, and withdraw the entire slave cylinder from its bracket.
  3. If your old mounting bolts are rusty and corroded, replace them with new M8x25 bolts and nuts. Before dropping the new slave cylinder into place, you’ll want to be sure the rearmost (closest to you) mounting bolt is safely installed in its hole, as it will be impossible to get it in once the slave cylinder is in place. If necessary, prevent the bolt from falling out by temporarily threading its nut onto it.
  4. Vanagon Clutch Slave Cylinder

  5. Put a dab of general-purpose grease into the small cup at the end of the slave cylinder actuator, to lubricate the ball on the clutch-engagement lever to which it will connect. Set the slave cylinder into place, making sure the cup engages the ball (it doesn’t need to ‘snap’ into place, but simply engage), and slip the slave cylinder over its mounting bolts (having previously removed the temporary nut from the rearmost mounting bolt). Loosely thread the nuts onto the mounting bolts but do not tighten yet.
  6. Start threading the pressure fitting into the slave cylinder by hand, then finish by wrench-tightening to 12 ft./lbs.. Tighten the mounting nuts to to 18 ft./lbs..


Once everything is satisfactorily reconnected, proceed to Bleeding the Vanagon Clutch Hydraulic System.

What do you think? Leave a question or comment below, and use the buttons to share with your friends!

Essential Vanagon Tools

“Usually, the only tool you need is the one you don’t have.”
Andrew A. Libby, Samba member

Basic Tools

The VW Vanagon will require few special tools, and most work can be performed with conventional tools available to the average home mechanic. The following is by no means a complete listing, but should give any home mechanic a strong start on repairing and maintaining a vintage van.


Optional Tools

I have also found the following tools helpful in certain instances:

  • Metric ratchet wrenches: same sizes as above, allow wrenching in tight spots
  • Brake flare wrenches
  • Metric hex bit sockets: similar to Allen wrenches but can be affixed to socket wrench
  • Complete metric crowsfoot wrenches: same sizes as above, allow wrenching in tight spots. NOTE: when used with a torque wrench, torque values must be re-calculated according to specs included with the crowsfoot wrenches
  • Vise-Grips: listed last here due to its frequent overruse, a brand name of some of the best locking pliers available, allowing astronomical clamping forces on hardware and other parts. I’ve seen old Type-2 Buses sailing down the highway with certain crucial engine parts held in place by such pliers, a technique not endorsed by Camp Westfalia.

Depending on your available space, mechanical abilities, and how far you typically venture from home, you may want to carry some or all of these tools aboard your Vanagon.

What do you think? Leave a question or comment below, and use the social links to share with friends!

Recommended Vanagon Workshop Manuals

“If money is your hope for independence you will never have it. The only real security that a man will have in this world is a reserve of knowledge, experience, and ability.”
Henry Ford (1863-1947)

Personally, I can never have enough manuals, and throughout my years of VW ownership I have accumulated a small collection of workshop books which even remotely pertain to my van. Often, where one manual leaves you wondering, another will provide a ‘eureka’-inspiring photo or description.

Bentley-Vanagon“The Bentley”

First and foremost is the Official Factory Repair Manual, published by Robert Bentley, and rightfully considered “the bible” for Vanagon repair.

This was the manual used by the wrenchers at your local VW dealership, but now that most VW technicians have lain neither eyes nor hands on a Vanagon, the Bentley is used only by the occasional independent shop and by shade-tree diehards like you and me. It remains the final authority in accuracy and precision, providing the proper sequences, torque values, and tolerances for most repairs. Repairs are well organized by topic and sub-topic.

Get the Vanagon Bentley manual here

Haynes-Vanagon“The Haynes”

As its title implies, the Bentley often presumes I am an “Official VW Repair” technician, surrounded by a staff of equally seasoned wrenchers with years of collective experience with whom I can confer. By contrast, the Haynes manual assumes I’m just a lonely guy with a good socket set and a sloppy balljoint, and gives me what I need to fix it. Step-by-step instructions, accompanied by concise photos where needed, walk me right through most repairs.

There are two Haynes manuals covering the Vanagon (known as the Transporter everywhere except North America):

Get the 1980-83 Air-Cooled Haynes manual here

Get the 1982-90 Water-Cooled Haynes manual here

Q: Bentley or Haynes?
A: Both

If there is anything for which the Bentley can be faulted, it is perhaps its brevity. It often omits the most basic and preliminary steps of a given procedure, sometimes leaving one standing beneath the proverbial shadetree, scratching one’s proverbial head.

For example, for replacing your clutch master & slave cylinders, the Bentley offers perhaps 20 words and an exploded view. The Haynes, by comparison, devotes several hundred words and a couple of photos to the same procedure. For someone doing his first hydraulic clutch job, these sequential steps, while perhaps redundant for an ace mechanic, can inspire a rookie to proceed with some confidence.

If each manual has its strengths, I’d say go to the Bentley for accuracy; go to the Haynes for thoroughness. I always consult the Bentley first, especially for any sort of tolerance, torque, dimension, etc., and although I’ve never found a blatant inaccuracy in the Haynes, I will always defer to the Bentley in a case of conflicting data.

“Auto Repair for Dummies”

If you’ve owned as many crummy cars as I have, you are probably already a graduate of the Automotive Institute of Bloody Knuckles, and you may well know your way around a 30-year-old Vanagon.

But if you’re new to the whole wrenching thing (and everybody was, at some point), you might want to start with the basics.

“Auto Repair for Dummies” by Deanna Sclar is perhaps the next best thing to having a knowledgable, helpful, encouraging mentor standing at your elbow offering advice and handing you tools.

Like most books in the “Dummies” series, this one unpacks the seemingly complex structure of a car into its various simple systems and how they fit together, followed by more detailed overviews of each sub-system. Safe working practices, troubleshooting, preventative maintenance and repair, emergencies, and step-by-step illustrated instructions that even a newbie can groove on.

Though few modern cars on the road today are as easy to work on as the Vanagon, the knowledge you’ll gain from “Auto Repair for Dummies” will help you maintain all your other cars too, or at least be a more informed consumer when taking them to a local shop.

“Auto Repair for Dummies” will not only help you be a better partner to your Vanagon, but also to reclaim the lost art of self-reliance and independence.

Get Auto Repair for Dummies here

Other Helpful Vanagon and Diesel Workshop Manuals

In addition to dedicated Vanagon manuals, I keep a few other helpful workshop manuals in my diesel Westy library, in order of pertinence:

Peter Russek Pocket Mechanic Volkswagen Transporter
Sort of a compromise between the abovementioned books: explanatory text like that in the Haynes, plus itchy-and-scratchy drawings evidently traced from the Bentley. Written by Britons for Britons, so you’d better know your spanner from your dynamo …

Haynes 77-84 Diesel Rabbit, Jetta, Pickup
Extensively covers the 1.6L diesel engine. Other chapters offer insight into parts and procedures common to most VW vehicles: brakes, suspension, etc..

Chilton’s Volkswagen 74-89 Front Wheel Drive #(8663) 70400 ISBN 0-8019-8663-X
Covers Volkswagen gasoline and diesel engines of this era. No Vanagon-specific info.

Haynes 81-85 Scirocco/Jetta/Rabbit
Mainly covers gasoline engines, but includes many notes on the 1.6L diesel. No Vanagon-specific info.

Chilton’s VW Front Wheel Drive 74-83
Only covers gasoline-engined cars, but the 1.6L diesel engine is based very closely on these gasoline engines, and in fact shares many parts with them.

Bentley Volkswagen Service Manual: Jetta, Golf, GTI: 1993-1999; Cabrio: 1995-2002
I replaced the original 1.6L diesel engine in my Vanagon with a new engine intended for a 93-99 Golf, so this manual is helpful when working on my new engine. If your Vanagon has a similar engine transplant from another VW model, or a Subaru or Ford Zetec conversion, the appropriate workshop manuals will be invaluable when doing your own wrenching.

What do you think? Leave a question or comment below, and use the social links to share with friends!